If you did not enable the virtio rootDiskController during the creation of your Windows VM then the virtio disk controller driver was not installed in the process of installing the virtio drivers.
To install the virtio disk driver, shutdown the VM,
1. Attach the Windows virtio ISO
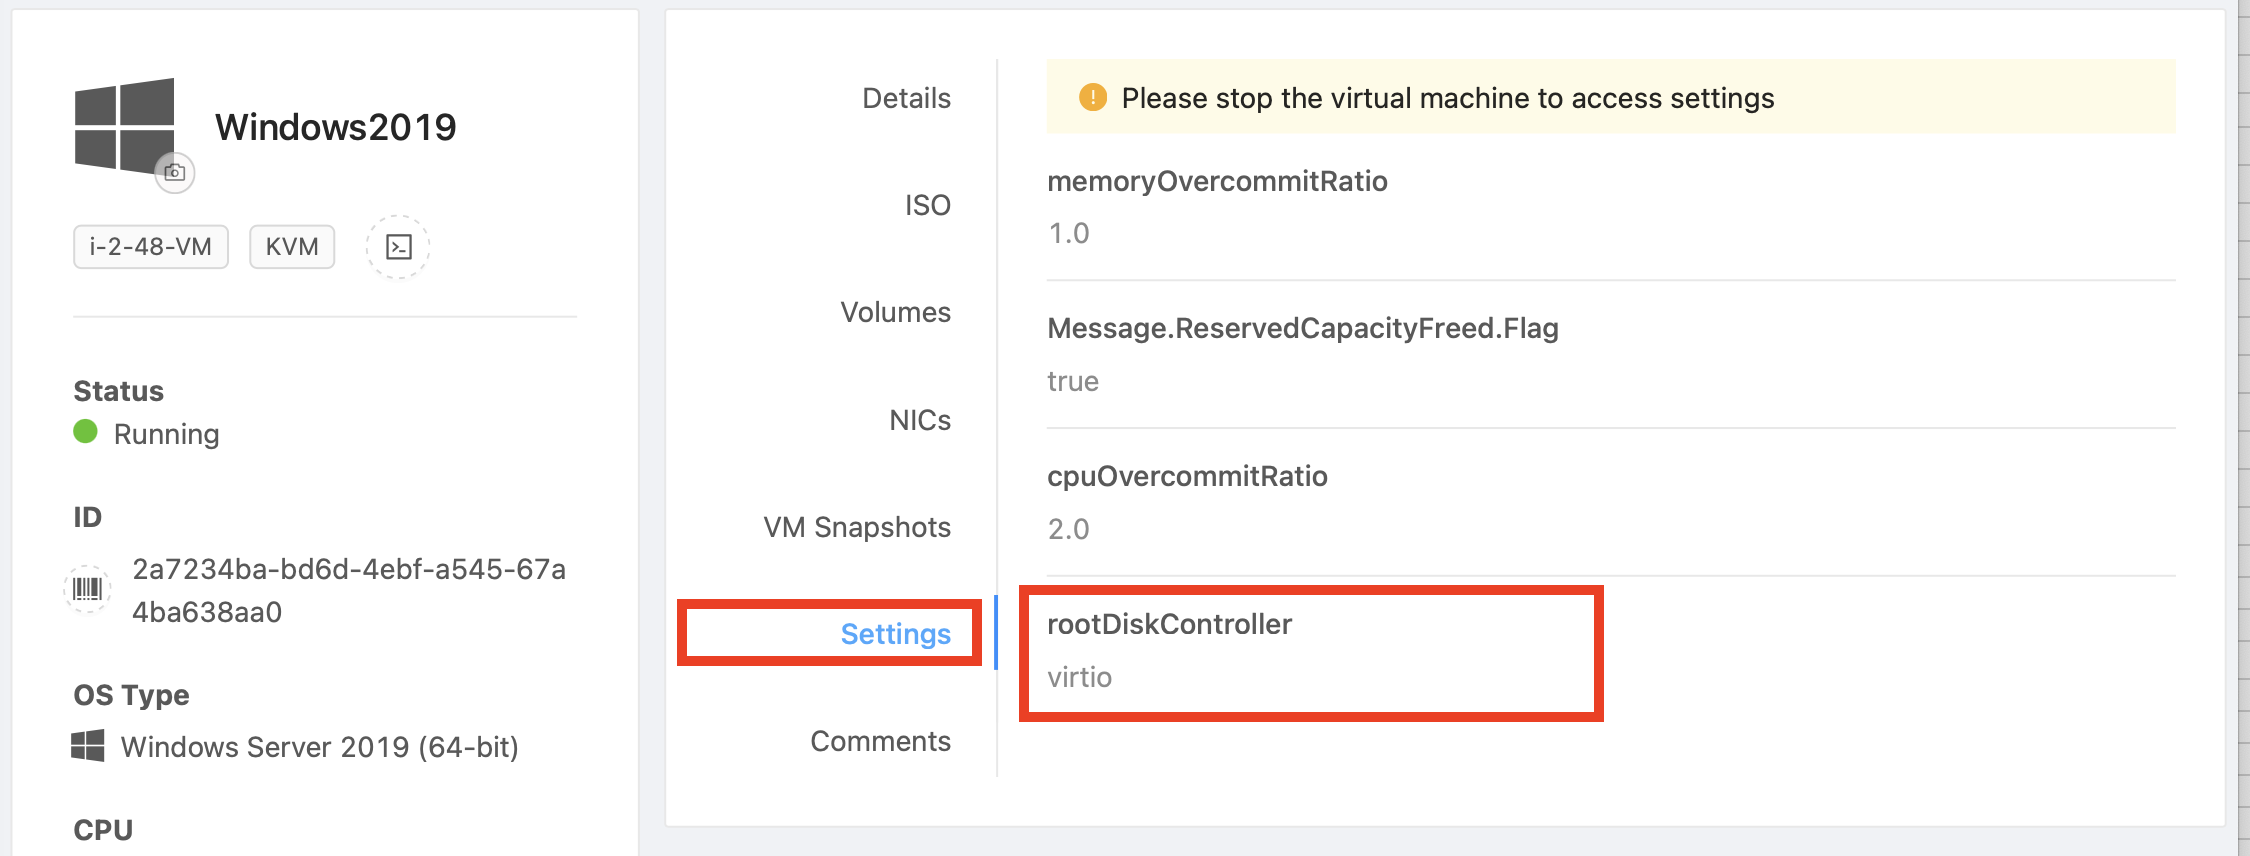
2. Click on the VM name to get to its option page shown below.
Click on settings and select virtio for the rootDiskController setting.
3. Start your Windows VM and open the console. Your VM will not boot normally and eventually display a blue screen with 2 options.
Select Troubleshoot

and then Command Prompt on the next screen.

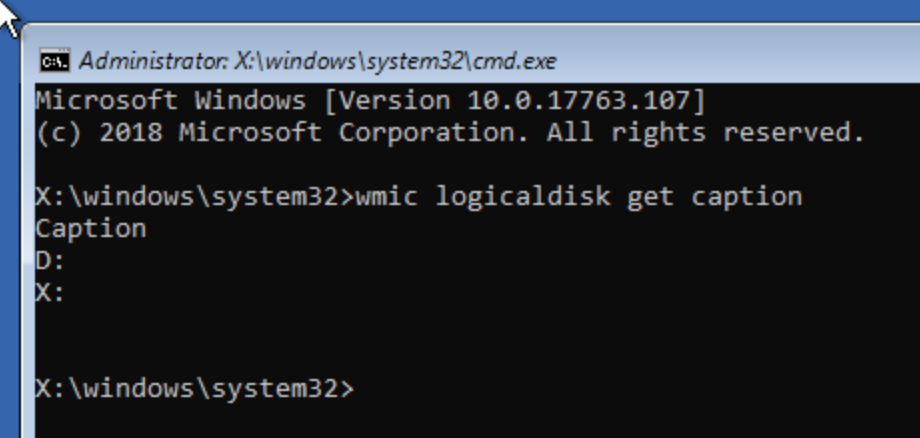
4. Once command prompt window is open, type:
wmic logicaldisk get caption
this will list the available drives, your recovery drive will usually be X: and the virtio driver iso will be C: or D: as shown below.
The storage virtio driver for Windows 10 64-bit will be found at D:\viostor\w10\amd64\viostor.inf
5. Navigate on the drive to find the path for your version. Once found, type: drvload "your path to viostor.inf"
drvload D:\viostor\2k19\amd64\viostor.inf
for Windows 2019

6. Verify there are new drives available by running:
wmic logicaldisk get caption again.
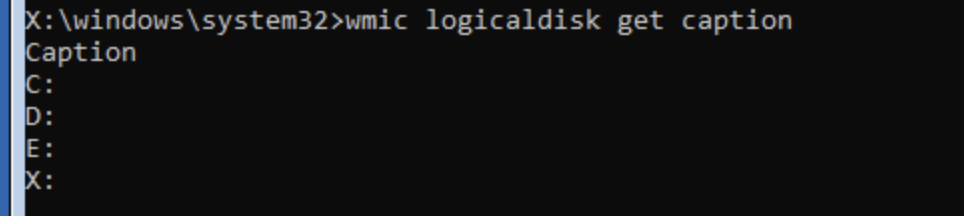
You now have access to your system drive. We will now install the virtio drivers on the system drive.
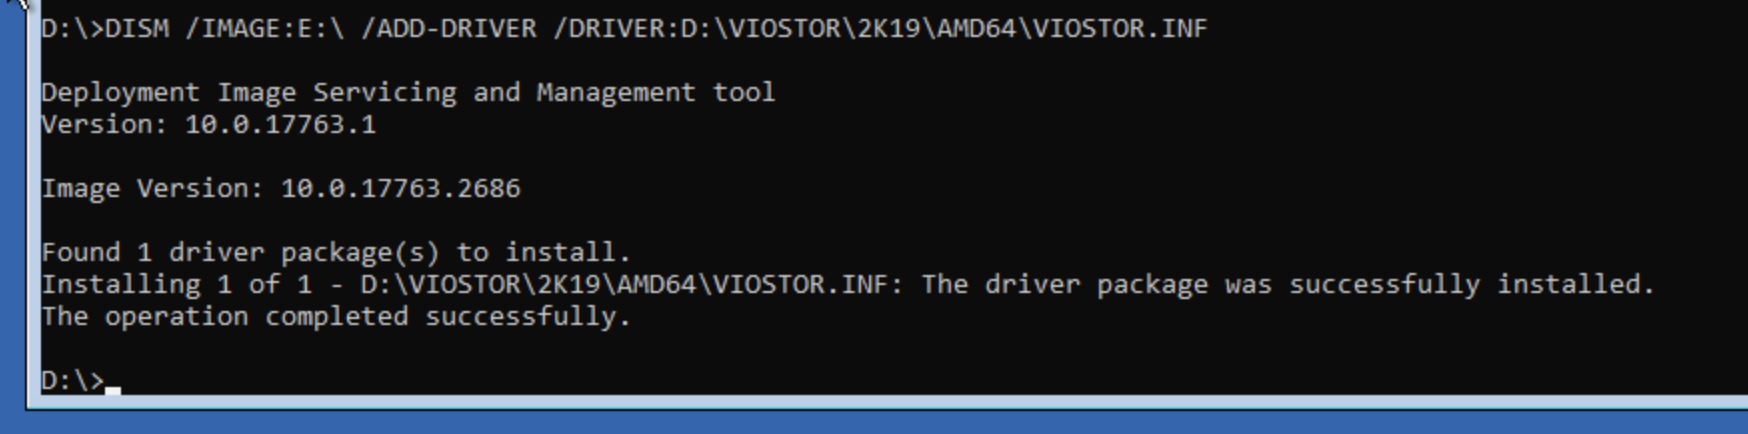
7. Install the driver using the DSIM command, you will need your system drive letter and the path to the virtio drivers for your Windows version found in step 5. Here is the example for Windows 2019:
dism /image:e:\ /add-driver /driver:d:\viostor\2k19\amd64\viostor.inf

If all is well you should see:


Close the command prompt window and reboot.